A family lives in our community with the last name Mello. They have children about the same age as my daughters. I often thought what a great topic of conversation it would be if my daughter, Marcia (pronounced like Marsha), married a Mello son. I could say, “Have I introduced you to my daughter, Marcia Mello?” Marcia’s never met the Mello family. It looks like she’ll never be Marcia Mello. Oh, well.
The first time, many years ago, that I heard of someone making homemade marshmallows, my reaction was, “I had no idea you could make marshmallows at home.” I’m not sure what it was about making marshmallows that made them so magical and mystical that they couldn’t be produced in a home kitchen. Interestingly enough, I’ve noted that several people have had the same reaction when I share my homemade marshmallows with them. The ingredients are few: plain gelatin, sugar, corn syrup, salt and vanilla. The process is simple: you make a sugar syrup, add it to dissolved gelatin and whip the daylights out of it. Maybe it seems magical because there isn’t anything else, that I can think of, that has the same consistency as a marshmallow. People make congealed salads often and use gelatin, but the consistency of a marshmallow and a congealed salad are vastly different. Sugar syrup is a common kitchen ingredient but takes on a completely different personality with the addition of gelatin. I just convinced myself that we are dealing with magic here. That’s the only logical explanation. Marshmallows are magic.
Back to the situation with Marcia marrying a Mello. Maybe we not convinced it won’t happen. Our family refers to marshmallows as “marciamallows”. We don’t give up on good ideas around here.
Y’all come see us!
Homemade Vanilla Marshmallows
The process for making marshmallows is easy but does require specific equipment. The first is a candy thermometer. The syrup solution must reach a certain temperature in order for the marshmallows to set. Secondly, I don’t know that a hand mixer, or your arms, would hold up long to whip the hot mixture to the right consistency and temperature. A stand mixer is surely necessary.
3 packages unflavored gelatin
1 cup ice water, divided
1 1/2 cups granulated sugar
1 cup light corn syrup (I used Karo)
1/4 teaspoon kosher salt
1 teaspoon vanilla extract
1/4 cup powdered sugar
1/4 cup cornstarch
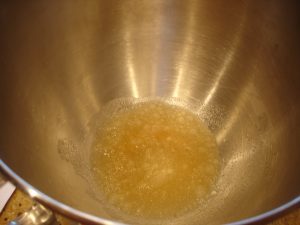
Place gelatin and 1/2 cup water in the bowl of a stand mixer.
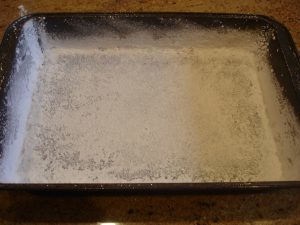
Mix powdered sugar and cornstarch in a small bowl. Prepare a 9 x 13 pan by spraying with a non-stick spray. Coat the pan completely with the sugar/cornstarch mixture. Keep the non-stick spray and sugar/cornstarch handy. We’ll be using both of these again.
In a medium saucepan combine 1/2 cup water, granulated sugar, corn syrup and salt. Make sure you have at least a medium size saucepan. The mixture will bubble up as it boils. You don’t want it to be more than 1/3 full before you start cooking.
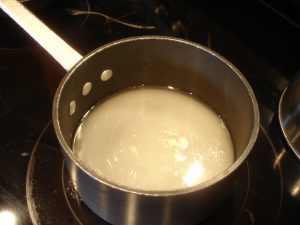
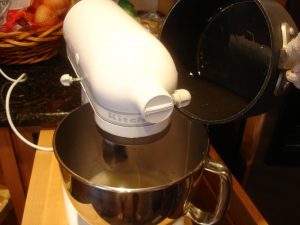
Attach the whisk attachment and turn mixer on low speed. Slowly pour the HOT sugar syrup in the gelatin and water mixture. This stuff will burn the fire out of you if it splatters on you. Be careful. Be very careful.
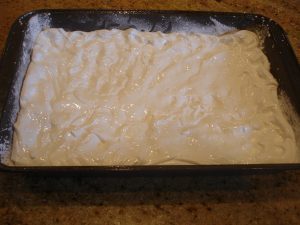
Using a spatula that has been sprayed with non-stick spray, pour the mixture into your prepared pan. Use your spatula or your fingertips (sprayed with non-stick spray) to pat the mixture in the pan evenly. No matter how hard you try, you will get marshmallow cream all over your hands and you will be sticking to things you never before thought possible. It’s all part of marshmallow making. Just go with it.
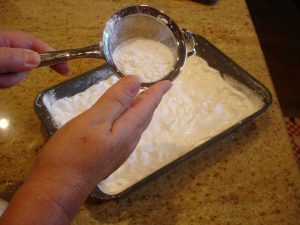
Sift sugar/cornstarch mixture all over the top of the marshmallows. Let it sit on your counter for at least 4 hours up to all night.
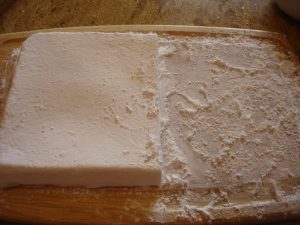
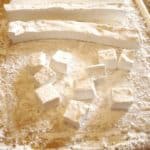
After the marshmallows have “cured”, turn them out onto a board that has been covered well with the sugar/cornstarch stuff. Don’t be stingy with it, either. Remember, marshmallows are the glue that holds Rice Crispy cereal together enough that you can cut it into squares. Cornstarch will keep marshmallows from sticking to you and everything else in your kitchen.
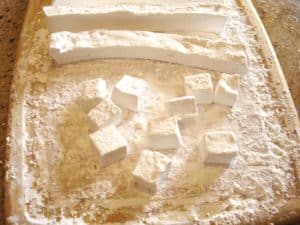
Keep all exposed marshmallow surfaces dusted with cornstarch/sugar. Cut strips that are one inch wide. Roll each strip in cornstarch/sugar that’s on your board before you start trying to cut the strip into squares.
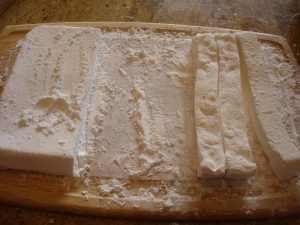
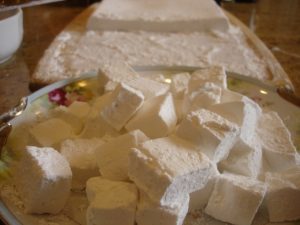
Store in an airtight container. If you’re going to stack the marshmallows, sprinkle some cornstarch/sugar between each layer. This is especially helpful if you live in an area that has a high level of native humidity. Learn from my mistakes. I have tried leaving the cornstarch out and just dusting with powdered sugar. I still tear up just thinking about it.
Enjoy your Homemade Vanilla (magical) Marshmallows!
You might also enjoy:
Homemade Vanilla Marshmallows
Ingredients
- Homemade Vanilla Marshmallows
- The process for making marshmallows is easy but does require specific equipment. The first is a candy thermometer. The syrup solution must reach a certain temperature in order for the marshmallows to set. Secondly I don't know that a hand mixer, or your arms, would hold up long to whip the hot mixture to the right consistency and temperature. A stand mixer is surely necessary.
- 3 packages unflavored gelatin
- 1 cup ice water divided
- 1 1/2 cups granulated sugar
- 1 cup light corn syrup I used Karo
- 1/4 teaspoon kosher salt
- 1 teaspoon vanilla extract
- 1/4 cup powdered sugar
- 1/4 cup cornstarch
Instructions
- Place gelatin and 1/2 cup water in the bowl of a stand mixer.
- Mix powdered sugar and cornstarch in a small bowl. Prepare a 9 x 13 pan by spraying with a non-stick spray. Coat the pan completely with the sugar/cornstarch mixture. Keep the non-stick spray and sugar/cornstarch handy. We'll be using both of these again.
- In a medium saucepan combine 1/2 cup water, granulated sugar, corn syrup and salt. Make sure you have at least a medium size saucepan. The mixture will bubble up as it boils. You don't want it to be more than 1/3 full before you start cooking.
- Place on medium high heat covered for 4 minutes. Uncover and cook until the syrup reaches 240 degrees which usually takes me 7 or 8 minutes. Today, it took 9 minutes. There's no need to stir while it's boiling. Remove from heat as soon as the correct temperature is reached.
- Attach the whisk attachment and turn mixer on low speed. Slowly pour the HOT sugar syrup in the gelatin and water mixture. This stuff will burn the fire out of you if it splatters on you. Be careful. Be very careful.
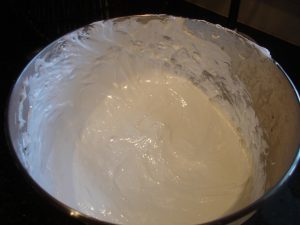
- After all the syrup has been added, turn mixer to high and let her go until the mixture is thick and lukewarm This will take somewhere between 12 and 15 minutes. The mixture needs to be the same consistency as....well.....marshmallow cream. You'll know it when you see it. Add vanilla during last minute of whipping.
- Using a spatula that has been sprayed with non-stick spray, pour the mixture into your prepared pan. Use your spatula or your fingertips (sprayed with non-stick spray) to pat the mixture in the pan evenly. No matter how hard you try, you will get marshmallow cream all over your hands and you will be sticking to things you never before thought possible. It's all part of marshmallow making. Just go with it.
- Sift sugar/cornstarch mixture all over the top of the marshmallows. Let it sit on your counter for at least 4 hours up to all night.
- After the marshmallows have "cured", turn them out onto a board that has been covered well with the sugar/cornstarch stuff. Don't be stingy with it, either. Remember, marshmallows are the glue that holds Rice Crispy cereal together enough that you can cut it into squares. Cornstarch will keep marshmallows from sticking to you and everything else in your kitchen.
- Keep all exposed marshmallow surfaces dusted with cornstarch/sugar. Cut strips that are one inch wide. Roll each strip in cornstarch/sugar that's on your board before you start trying to cut the strip into squares.
- Cut each strip into 1 inch squares. Roll each square in cornstarch/sugar.
- Store in an airtight container. If you're going to stack the marshmallows, sprinkle some cornstarch/sugar between each layer. This is especially helpful if you live in an area that has a high level of native humidity. Learn from my mistakes. I have tried leaving the cornstarch out and just dusting with powdered sugar. I still tear up just thinking about it.
- Enjoy your Homemade Vanilla (magical) Marshmallows!


Jean says
I want a stand mixer just for that purpose!!!
Jackie Garvin says
Jean,
I use my stand mixer a good bit. I really haven’t had it that long. I don’t know how I got along without it. I had to give up making Divinity candy until I got it. My little hand mixer, that I got as a wedding gift 36 years ago, just couldn’t hold up. It would overheat and shut down. It always came back but sometimes it took it a few days to recover. You can’t make Divinity that way. 🙂
Danny Taylor says
LOL…Can’t help but laugh Jean!! As I scrolled down the page and saw the photo of the mixer my first thought was..”I have got to buy a stand mixer to do this marshmallows”…I will use this recipe as there are many times I need puffy white delites and do not have them nor want to make a special trip to pick them up…just the tipping of the scale now to get one!! Thanks Jackie!
Jackie Garvin says
Danny,
First knives, now stand mixer. Retirement is going to be costly for you! 🙂 I would highly recommend a KitchenAid Artisan. That’s not their top of the line mixer but it works just fine for me. It’s sturdy and there’s a wide variety of attachments you can get.
Danny Taylor says
Hahaha..yeah, I’m going to have to find a part time job to support my habit here…well, maybe not!!
Yes the Kitchen Aid Artisan Stand Mixer is the featured mixed on the Food Network web site…must be an omen…haha…just got to get it all together…thanks for the advice!!!
Jackie Garvin says
Good luck, Danny! 🙂
Mary says
OK, I am going to tell on myself…….I would be so upset if my little hand mixer died. Got it as a wedding gift from my Mom 42 yrs ago. So, as part of my holiday candy making, I needed a really heavy duty mixer for my divinity. Here is what I did…..took one beater and attached it to my husband’s electric drill. Now candy making is a breeze and for sure, the drill does not overheat.
Jackie Garvin says
Mary,
That is the funniest, sweetest, and smartest story! I love, love, love it! I wish I’d thought of that when I was trying to use my hand mixer for Divinity. I just flat out had to stop making it until I got a stand mixer. 🙂
Jean says
Danny and I will be off to the store soon! LOL! One note…Hobart used to make kitchenaid. They are no longer in business and Whirlpool makes these now.
Jackie Garvin says
Jean,
My KitchenAid is relatively new and it works well. Whirlpool didn’t seem to mess mine up. 🙂
Danny Taylor says
Jean, I already have my name on a beautiful red KitchenAid Artisan at Amazon…soon as I bad my block set of knives and rearrange the kitchen to find a place for all this newfangled cooking “Stuff” that cuz Jackie has throwed a craving on me for….so it’s going to be a fun new year!!! And I’ll have to buy a new wardrobe to accommodate the new and enlarged body mass from all these good groceries I’m gonna be fixing up….just have to temper the menu with some healthy alternatives thrown in once in a while! Haha!!!
Marylyn Gillespie says
I love your thought Marsha-mello! I used to tell my daughters I wished I had named one of them Glory so when they got up in the morning I could say “– morning Glory!” My husband has been wanting to buy me a stand mixer but I keep telling him I have no counter space to sit it on.
Jackie Garvin says
Marylyn,
Morning, Glory! When I had my kitchen remodeled a couple of years ago, I had a stand built for my mixer that lifts out of a cabinet. I just love it because the mixer is heavy to lift and this makes it so much easier. Also, I don’t have to take up counter space to accommodate the mixer. 🙂